Baby Bunny!


Isn't this little bunny just the cutest thing! I've been trying to think of something to make my little cousins for Easter and I'd spotted lots of cute bunny stuffed animals everywhere. After a little searching I decided to make my own.


So I made this little template, he's A4 size in height and a few inches across. If you want to use this template, just save the image and then fit it to an A4 page on Publisher, Pages or whichever programme you choose and print. 


Lay your wee cut out bunny on your chosen fabric and draw round your bunny shape with a pencil. I've folded over my fabric so I can get the two shapes I need to make my stuffed animal and the side I drew on is the inside so it won't be seen once it's all sewn up. 
Once you've cut him out you might want to iron the fabric if it has creases to make it easier to work with. 


Next up is sewing on bunny's eyes, nose and mouth. Pick one piece and draw them on where and how you want them to be. Pop him in an embroidery hoop to make it easier to sew these on. 


Next up place your two pieces together, the bottom one should be pretty side up and the top piece should be pretty side down. So the two are face to face with each other. 

Pin these in place and sew carefully alone the edge with around a half a centimetre seam allowance. 


Now we're going to turn him inside out. This part is tricky and a paint brush or chopstick can be essential in helping poke through his little ears. 


His ears are tricky and you'll have to persevere with them, use the end of a paintbrush or something similar to turn them the right way out again. 


Next we start stuffing. Start with the ears and small pieces of wadding work best built up and use your paintbrush end to stuff it tightly into the ears to the stand up on their own. 

Keep going until your bunny is stuffed full and you have about 2 centimetres of fabric so we can sew him up.


Fold the two pieces in on themselves, as you would with any hem and then pin these together like in the picture above. 

Now you have a choice you can hand stitch this with either a normal running stitch or an invisible stitch. Or you can pop the bottom in your sewing machine and quick sew along the hem you created.
This won't be as neat as say the invisible stitch but I personally think it adds to the homemade look of your little bunny. 


Then you have your little bunny!

Is there a little cutie in your life you'll be making a bunny for this Easter? (G even wants one!) 

Katy


Spring Planters!


I've been waiting for spring to come so I could plant some lovely things. We've been having the most dreary weather later, since spring apparently came we've had no sun and just a whole lot of wind and mist. I knew we needed something colourful to brighten up our little kitchen window ledge. 

Pinterest is full of pretty planters but at the moment we have very little space and decided on just a couple of little plant pots with some herbs and tomatoes in. 


I popped to Wilkinsons and spotted these little indoor gardeners pots with soil and seeds! Perfect, they were exactly what I needed and only cost a mere 70p I chose Basil, Chives and Tomato plants and then got three little plant pots. 


I've been holding on to these tester paint pots for a while now until they came in handy and knew they'd brighten up pots instantly. 


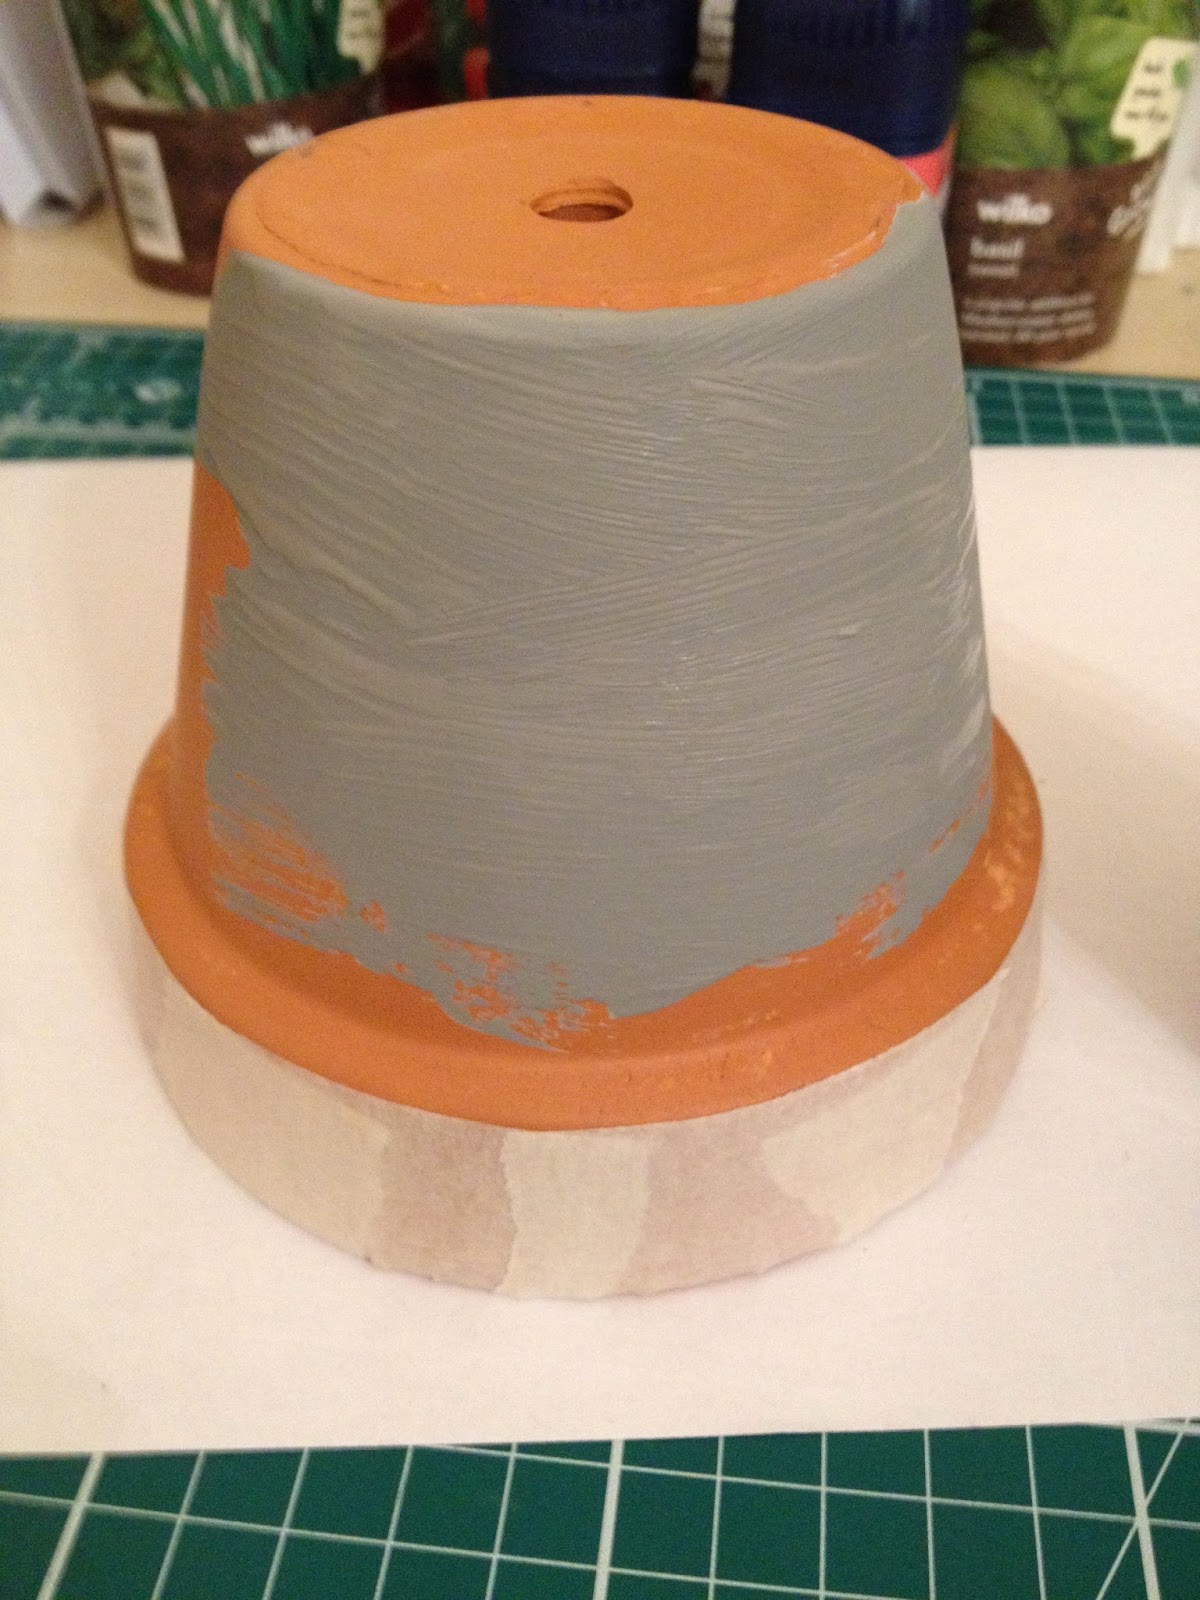
I lined the top of the pot with masking tape to get the colour block effect then painted a first coat of colour. 
Once the first coat was dry I added another one to make the pot nice and neat. 


I did this to all three of the pots in different colours and waited for them to dry before removing the tape from their tops and got ready to plant in them. 


I put a wedge of kitchen paper in the bottom of all of my pots to soak up the excess water when you water the plants, then popped the little plant pots inside these (until they grow and then I'll replant them in the bigger pots).


These pretty plant pots are sitting happily on my window ledge waiting to sprout into some lovely little plants. Hopefully soon we'll be eating our own basil and tomatoes!
These have been sprouting the past few days and making me so happy when there's another little sprig of green!

Katy


Teapigs Tea:

I first came across Teapigs tea in Kent while I was on holiday a few years back. I fell head over heels for them and have barely wanted to drink anything else since.


I'm a sucker for loose leaf tea as I think the flavour is ten times better and Teapigs give the option to buy all of their tea loose leaf as well as in tea bags. 
At the moment in my cupboard there is:
Two boxes of loose leaf Super Fruit, 
Four boxes of loose leaf Everyday Brew, 
and 
One boxes of Peppermint tea temples. 

And I love them all! 


The peppermint tea is just so delicious and no where near as sick sweet as other peppermint brands I've tried before. It's closer to mint leaves in hot water and I think that's what makes Teapigs so good at what they're doing. 


My personal favourite and my first Teapigs discovery was Super Fruit, it has cranberries, blueberries, elderberry and many more berries all packed in to one tea. Many fruit teas I think can smell delicious but lack any flavour but the combination of large pieces of dried berries and their own tea temples, which are much more roomy and use a biodegradable mesh, make the tea flavoursome and just so delicious!


I brewed up a cup of Super Fruit to enjoy while I wrote this. And it's still as good as ever!
It's super simple, just pop your tea temple boiling water for three minutes, remove your temple and enjoy! 

G loves this one: 
It's just good old English Breakfast (or now called Everyday Brew) but somehow it tastes better than any other English Breakfast tea I've ever had. It's always difficult to explain how English Breakfast tastes to me, it's just a perfect morning tea to wake you up. 

I also love their Camomile tea and the Mao Feng Green tea. My next try is going to be Spiced Winter Red tea or the Green Tea & Mint. 
Another great thing about these teas is that many of them can also be made into Iced teas by simply making the tea like normal and then topping up with ice water. 

Perfect simple summer drinks!


Katy

A few wonderful things!

It's spring! Well apparently... I'm not sure it's really spring here, we're yet to have any sun!
To brighten up your spring I thought I'd share a few wonderful things with you all:

(Image from Cocorrina.com)

Isn't this just the cutest spring Wallpaper! It's going to make my Mac feel like spring even when it's misty and rainy outside. If you want brightening up too find this wallpaper here at Cocorrina.com

(Image from jamieoliver.com)

This Gin & Elderflower cocktail from Jamie Oliver's website is the thing of my summery dreams! The new flavours from Gordons gin also look super yummy! Elderflower and Cucumber for your summery picnic cocktails. 

(Image from ATTN Studio)

These Diamond planters from ATTN Studio on Notonthehighstreet (one of my favourite websites) are so pretty and springy! 
I'm looking forward to moving and having more space to plant and grow things and these would be so cute for growing herbs indoors. 

(Image from Jane Means)

My family have a tradition of an Easter tree at home, even though I can't remember how this started but I do think it's so pretty. And putting pastel colours everywhere is always fun! These little Speckled Easter Eggs from Jane Means on Notonthehighstreet would be perfect for adding a little colour to your home. 

(Image from Trelabela Etsy)

Ahh! As you know I'm a cat lover and this cushion is just perfect! From Trelabela on Etsy the cushion is hand painted and just the sweetest thing. He reminds me of the Cheshire Cat with that smirk. Also find Trelabela on blogger.

(Image from Mypeeptoes.com)
I've been swooning over Eames chairs for ages now and of course I can only dream of affording one but I dream all the same. I love how Mypeeptoes.com styled her chair and just made it look even more perfect to me. Maybe one day...


(Image from Halfbakedharvest.com)

These Blueberry Granola bars from Halfbakerharvest look so yummy! These are on my Easter holiday to do list. I can imagine that these would be delicious for breakfast or as a snack, the yogurt drizzle looks to die for. 


I'm looking forward to the end of Lent as I can finally eat some chocolate again. And the Easter break as I'll be 20 very soon. Of course who isn't looking forward to spring and some warmer weather!

What are you looking forward to in the next few months? 

Katy


NoraJane Handmade Stamps


I love stamps, you may have spied them in a lot of my previous posts. I love that little extra you get from a handmade stamp and I stumbled upon NoraJane on Etsy and fell in love with the work.


So far I've got five of their stamps. Two sewing themed ones and three Woodland ones, the lines and work on them are incredible and so impressive. 

I have used the sewing ones to make 'Handmade for you' tags on presents I've have made and thought today I would try out the Woodland themed ones and give you guys a little peak..


I have a wee trio of trees, a doe and double acorns. When I was choosing from their selection it took me forever as there was just so many pretty stamps to choose from!


I just adore this little doe who looks like she's leaping across my card!


I think though that the trees have to be my favourite, I like that they resemble a forrest when you stamp them in a line. Very cute and perfect for a simple card and just general stamping!


Finally these little acorns are just the sweetest things, I can't quite believe the detail on such a tiny stamp! The acorns have delicate crosshatching on them that makes them look life like on the page.


If you're looking for a beautiful handcraft stamps with amazing detail NoraJane is the perfect place to buy! 

Katy


Scrapbooking!

I was sifting through old photos from Sixth Form the other day and it was bringing back so many memories, unfortunately the photos were in the back of a draw as I don't really have anywhere to put them.


As I was reminiscing I decided that I needed to put these into a scrapbook so I could look back at them and they'd be to hand rather than just in a draw.


My desk is often a huge mess and it gets crazy when I scrapbook, but it's my favourite time because all my crafting things are out and I'm in my element. 


So what are the essentials I'd recommend for Scrapbooking? 

Scotch Photo Corners could not be more useful when it comes to putting photos in my scrapbook, I'm not big fan of glue as it gets everywhere and if you're sticking whole pages it can warp them a little and ruin the look of your book, but these corners can be placed anywhere and seem pretty easy to remove too. (So you can change your mind later!) 


What's in my craft boxes? Well I have plenty of different inks, a huge stash of wash tapes (Check out the Washi tapes post for ideas on how to use it!) and stamps. I also have coloured strings from RE and various Hobbycraft bits and bobs.


Pens! Pens, pencils, markers all of them, if you've got them in your stash they can be invaluable, you can draw with them or just make your hand writing much prettier. 
I love the Uniball ones, they have plenty of colours and I've had these for months and they're still going. 

Tips on Scrapbooking!


I find it's easiest to sketch out where you want everything to go and once you're happy stick everything in. 


Grab your pencil! It might seem like common sense but sketching out in pencil first with either drawings or text is a good way to make sure you like everything together. And if like me it takes a couple of goes to get it perfect. 


Simple isn't boring. It can be super fun to draw illustrations and pictures but sometimes a whole book of this can be distracting and hard to enjoy. Sticking two similar pictures next to each other can be just as effective as filling a page.


I love Washi tape! (Just in case you hadn't noticed) In the above page I took two group shots from different nights and taped them in with a grey patterned Washi tape. I like that this is all I need to do to this page and the pictures just speak for themselves, they bring the colour and life to the page.


Sometimes you just want to doodle on a page. And I think doodling is good when there's only one or two pictures on a page. Try different fonts and colours that match your pictures to tie the page together. 


I'm big into arrows and laurels at the moment so I used used them throughout the book, I outlined my photos with arrows and straight lined text on this page and let the pictures take the focus.


Add a quote that means something to you is a wonderful way of reminiscing when you flick through your book. 


Or just fill your page with pictures of the people you love. 


Last tip? Just love your pictures and the rest will fill the pages. Is there something hilarious about  a picture you remember every time you see it, include it in your page and the memory will be even stronger when you look back. 

Once I've done a little more of my book I'll give you guys an update! 

Katy!