Weekends..


Hello! I hope you've all had a lovely weekend. 
G and I discovered the best fruit and vegetable stall our local market so we've been going through fresh food at a crazy rate.
On Saturday we made eggs and fresh grilled vegetables. So yummy! Local food is definitely the best kind of food. 


Anthropologie deliveries! YAY! I'm crazy for Anthro and there's always something I could add to my growing kitchen. This cute little egg crate has been on my wish list so thank you for my birthday discount Anthro!


We treated ourselves to a waffle maker this weekend and had such a good breakfast on Sunday! Seriously how have I survived without one of these? Try the lovely Lemon Sugar's waffle recipe for the greatest waffle ever (I promise)!


I also had fun and some down time making the sweetest DIY Hostess Apron from Stylemepretty!
Using fabric that had been looking for a home and tweaking a few things here and there I ended up with such a cute little apron I'll surely be making for everyone I know!


My pleats aren't perfect as this was actually the first time I've ever done them but I still love it! The perfect use for this fabric. 

It's been a crazy Monday and feels like the week should be over already but only a few more days and I'll be (almost) free from University for the Summer! 

So watch out for a few exciting things happening this next few weeks!

Katy!

Blueberry Granola

I've been trying, but sometimes the Easter eggs win, to eat a little healthier recently, so I thought I'd make some healthy granola for breakfasts. And spotted fresh blueberries at our local market so decided on blueberry granola with Flaxseeds and sunflower seeds!


Ingredients: To make 650g of Granola,

350g Blueberries
500g Jumbo Oats
100g Sunflower seeds (ground)
100g Flaxseeds
100ml Agave Nectar
75g Butter melted


Mix together your Oats, Flaxseed and sunflower seeds in a large bowl. Make sure it's all evenly combined. 

Put the blueberries in a roasting tray and pop in a 200' Celsius oven for 45 minutes, half way through squash some of the blueberries down and mix them up.


Next up add in your Agave nectar and melted butter. This should combine them enough that they stick slightly but aren't one big stodgy mess. 


Once your blueberries are done, let them cool and then add them to the Oaty mix. 


Split into 3 pans and bake for 10 minute intervals stirring in-between. Do this 3 or 4 times depending on how crispy you like your granola. 


Pop into sealed boxes and use whenever you want. It will probably last 1 or 2 months. 
This is absolutely delicious served with greek yogurt or maybe on top of a thick fruit smoothie.  

Enjoy!

Katy


Whitley Bay:

I'm 20! Woohoo! I feel like and adult now, it's so different saying twenty and not teen anymore. I had a lovely birthday just hanging out with G, we had lunch and I used my birthday money to invest in a new DSLR camera.

I chose the Nikon D3200 after plenty of research and a couple of test runs in the shops I committed and went for it. So far it works like a dream and I'm in love with the crisp clear images I get in comparison to my iPhone.

The day after my birthday we decided to take a picnic in my new basket (my amazing parents present to me!) and catch the metro to Whitley Bay as G used to go all the time as a kid and wanted to show me the sights.


The sun was shining and it was such a lovely day, I even got my sunglasses out! 


The sky was so blue and it was just lovely to be beside the sea. We were trying to walk to the lighthouse you can see in the distance, St Mary's, where G visited as a little boy. It looks a lot further than it is, we only walked about three quarters of the way there before the wind just got too cold and we headed back. 


This picnic basket was a birthday present from my parents, it's all decked out with green and blue cutlery and plates/cups. It's an antique and it's so perfect I don't know how my Mum thought up something so incredible! We packed up some homemade sausage rolls and popcorn, some carrot sticks and leftover cookies and cream birthday cake (Courtesy of G!). It was delicious but freezing! 


I spent forever testing my camera and getting tons of shots of the waves crashing against the walls. I always love watching this and I'm a little obsessed with the sea, I've loved it ever since I was a kid. Blame several holidays to Cornwall where I'd often wade out into the sea up to my neck and bodyboard all the time.


I loved spending the day soaking up the Vitamin D and enjoying G's week off work.


G and I are going down to Cornwall for our holidays in September and I can't wait, I actually want to learn to surf this year! If anyone has any good places to visit I'd love suggestions? I'm looking for the places that aren't on the guides, the kind of places only the locals know about? 

Katy

Baby Bunny!


Isn't this little bunny just the cutest thing! I've been trying to think of something to make my little cousins for Easter and I'd spotted lots of cute bunny stuffed animals everywhere. After a little searching I decided to make my own.


So I made this little template, he's A4 size in height and a few inches across. If you want to use this template, just save the image and then fit it to an A4 page on Publisher, Pages or whichever programme you choose and print. 


Lay your wee cut out bunny on your chosen fabric and draw round your bunny shape with a pencil. I've folded over my fabric so I can get the two shapes I need to make my stuffed animal and the side I drew on is the inside so it won't be seen once it's all sewn up. 
Once you've cut him out you might want to iron the fabric if it has creases to make it easier to work with. 


Next up is sewing on bunny's eyes, nose and mouth. Pick one piece and draw them on where and how you want them to be. Pop him in an embroidery hoop to make it easier to sew these on. 


Next up place your two pieces together, the bottom one should be pretty side up and the top piece should be pretty side down. So the two are face to face with each other. 

Pin these in place and sew carefully alone the edge with around a half a centimetre seam allowance. 


Now we're going to turn him inside out. This part is tricky and a paint brush or chopstick can be essential in helping poke through his little ears. 


His ears are tricky and you'll have to persevere with them, use the end of a paintbrush or something similar to turn them the right way out again. 


Next we start stuffing. Start with the ears and small pieces of wadding work best built up and use your paintbrush end to stuff it tightly into the ears to the stand up on their own. 

Keep going until your bunny is stuffed full and you have about 2 centimetres of fabric so we can sew him up.


Fold the two pieces in on themselves, as you would with any hem and then pin these together like in the picture above. 

Now you have a choice you can hand stitch this with either a normal running stitch or an invisible stitch. Or you can pop the bottom in your sewing machine and quick sew along the hem you created.
This won't be as neat as say the invisible stitch but I personally think it adds to the homemade look of your little bunny. 


Then you have your little bunny!

Is there a little cutie in your life you'll be making a bunny for this Easter? (G even wants one!) 

Katy


Spring Planters!


I've been waiting for spring to come so I could plant some lovely things. We've been having the most dreary weather later, since spring apparently came we've had no sun and just a whole lot of wind and mist. I knew we needed something colourful to brighten up our little kitchen window ledge. 

Pinterest is full of pretty planters but at the moment we have very little space and decided on just a couple of little plant pots with some herbs and tomatoes in. 


I popped to Wilkinsons and spotted these little indoor gardeners pots with soil and seeds! Perfect, they were exactly what I needed and only cost a mere 70p I chose Basil, Chives and Tomato plants and then got three little plant pots. 


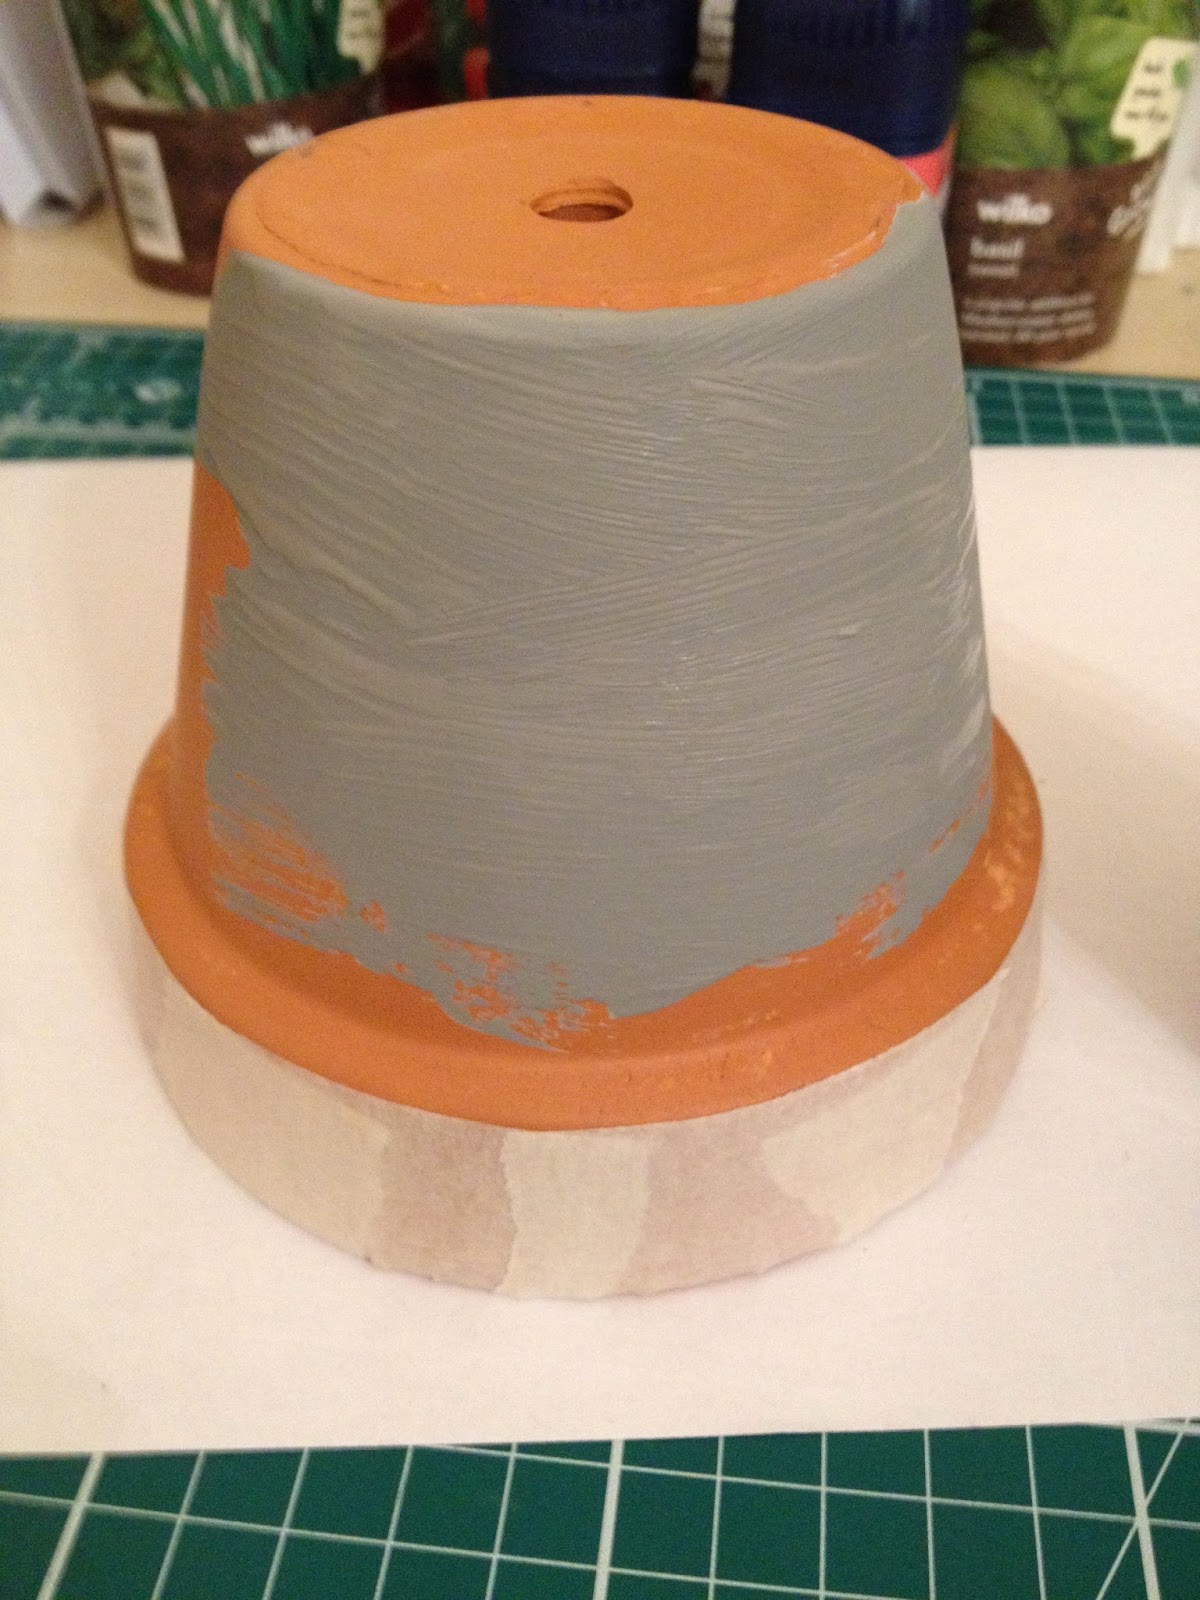
I've been holding on to these tester paint pots for a while now until they came in handy and knew they'd brighten up pots instantly. 


I lined the top of the pot with masking tape to get the colour block effect then painted a first coat of colour. 
Once the first coat was dry I added another one to make the pot nice and neat. 


I did this to all three of the pots in different colours and waited for them to dry before removing the tape from their tops and got ready to plant in them. 


I put a wedge of kitchen paper in the bottom of all of my pots to soak up the excess water when you water the plants, then popped the little plant pots inside these (until they grow and then I'll replant them in the bigger pots).


These pretty plant pots are sitting happily on my window ledge waiting to sprout into some lovely little plants. Hopefully soon we'll be eating our own basil and tomatoes!
These have been sprouting the past few days and making me so happy when there's another little sprig of green!

Katy


Teapigs Tea:

I first came across Teapigs tea in Kent while I was on holiday a few years back. I fell head over heels for them and have barely wanted to drink anything else since.


I'm a sucker for loose leaf tea as I think the flavour is ten times better and Teapigs give the option to buy all of their tea loose leaf as well as in tea bags. 
At the moment in my cupboard there is:
Two boxes of loose leaf Super Fruit, 
Four boxes of loose leaf Everyday Brew, 
and 
One boxes of Peppermint tea temples. 

And I love them all! 


The peppermint tea is just so delicious and no where near as sick sweet as other peppermint brands I've tried before. It's closer to mint leaves in hot water and I think that's what makes Teapigs so good at what they're doing. 


My personal favourite and my first Teapigs discovery was Super Fruit, it has cranberries, blueberries, elderberry and many more berries all packed in to one tea. Many fruit teas I think can smell delicious but lack any flavour but the combination of large pieces of dried berries and their own tea temples, which are much more roomy and use a biodegradable mesh, make the tea flavoursome and just so delicious!


I brewed up a cup of Super Fruit to enjoy while I wrote this. And it's still as good as ever!
It's super simple, just pop your tea temple boiling water for three minutes, remove your temple and enjoy! 

G loves this one: 
It's just good old English Breakfast (or now called Everyday Brew) but somehow it tastes better than any other English Breakfast tea I've ever had. It's always difficult to explain how English Breakfast tastes to me, it's just a perfect morning tea to wake you up. 

I also love their Camomile tea and the Mao Feng Green tea. My next try is going to be Spiced Winter Red tea or the Green Tea & Mint. 
Another great thing about these teas is that many of them can also be made into Iced teas by simply making the tea like normal and then topping up with ice water. 

Perfect simple summer drinks!


Katy